This is the second and final part two quick posts about what works for me with regard to travel photography. The first part covers what gear I've got with me and why and this part goes into a little detail about how I use it.
The camera kit you take is only half the story. What do you do once you've taken your amazing photos with all of that kit?
There's loads of information about taking photos on an extended trip and what camera kit to take but not many of them suggest practical ways to deal with the hundreds or thousands of images you end up with.
Based on my own experience from years of shooting and advice from photography and travel blogs I figured that there were four main ways of doing things;
1. Rely on using internet cafes or any other random computer we could find to either save to an external hard drive or to upload to the internet
2. Buy a specialised photo backup device to store images
3. Use a tablet or phone to store and possibly edit images
4. Take a laptop and store images on there
The first option seemed okay for someone who didn't see photography as one of their main interests and just took a few photos. But for me, I knew I'd be shooting lots of frames, preferably in raw, and this just wouldn't be a reliable way to go.
The second option seemed feasible and there are several devices that I looked into in some detail. I came very close to buying a Western Digital Wireless external drive on the basis that while it wasn't sold specifically as a photo backup device it could read SD cards directly. It didn't have many reviews at the time I was looking and looking at it again now the reviews are mixed. It seems to work as a card backup device, but the other features seem to need a bit of work.
The third option of just using a phone or tablet is lightweight and would give the option to view and edit images as well as share them online with friends. But for me the workflow it provided was too disjointed and too far removed from a process that I was used to. I didn't think it was practical to import, organise and store thousands of raw files on a tablet.
For me the first three options just couldn't compete with just taking a laptop as it provided a way to import, view and edit images. None of the first three really offered the ability to do this in a consistent and reliable way.
Importing & storing images on the road
The major downside of taking a laptop is having to take a laptop! Laptops are heavy and expensive and much more likely to be stolen than any of the other options, perhaps except the tablet/phone option.
I ruled out taking my 15 inch MacBook Pro, partly because it's so expensive and partly because it's so heavy. Instead I bought a second hand 11 inch MacBook Air from eBay. Again, I spent a while considering the options with lightweight laptops and didn't mind switching to Windows if I needed to. The MacBook Air was the perfect combination of small, light, just powerful enough and a relatively good price.
I looked back at how much space I'd used for all my photos to date and estimated that I'd need around 500GB to store a year worth of prolific photo taking (It's now apparent that was was a gross underestimate, as we're currently six months into our trip and I'm already near to 1TB). So I spent a while considering whether to use traditional HDDs or SSDs to store the images on, as the internal storage was too small to store a year worth of photos on, at 120GB. HDDs are more widely available, larger in capacity and much much cheaper. The advantage of SSDs, particularly for travel, is that they are much tougher physically and also a great deal lighter. They are however a lot more expensive and for smaller storage capacities.
I continued this internal debate right up until we left and I ended up having to make do with an existing external hard drive I'd had for a few years. Which went against my usual mantra of never trusting a single hard drive.
So when that single hard drive started failing after only our first week of travelling I only had myself to blame. Luckily I managed to copy all of our photos from the French Alps off and onto the laptop before it truly died.
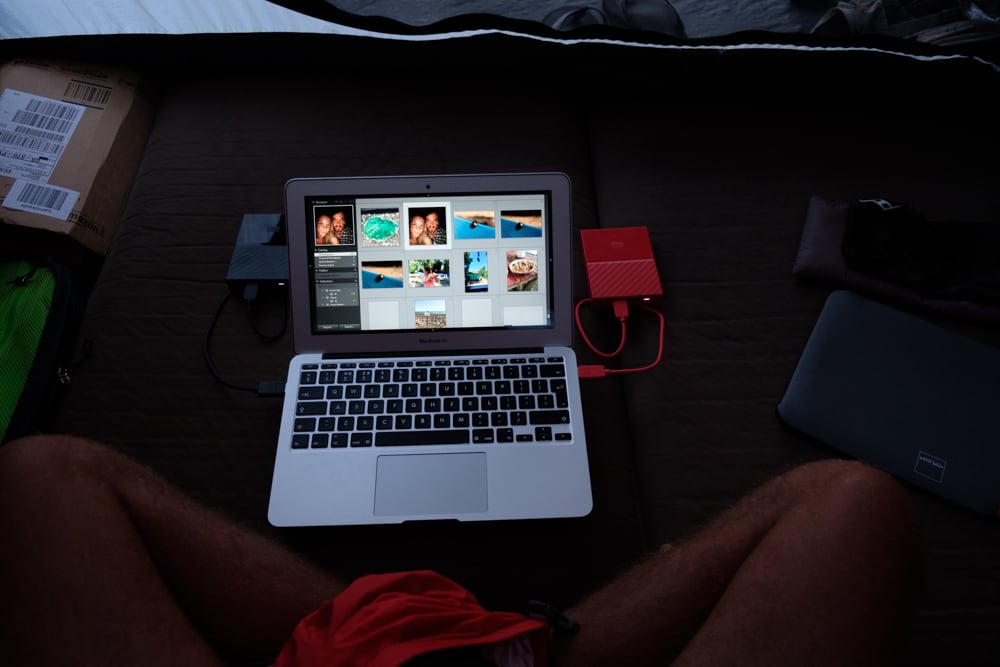
When we arrived in Greece I ordered two replacement drives from Amazon. Deciding to get two identical 2TB WD My Passport drives to make sure I had enough capacity and that I would follow my own advice again and never trust a single hard drive with things you don't want to lose. The main blog image shows me nervously copying data off the dying drive and figuring out my new workflow.
Now that I had two hard drives I needed a way to duplicate my images onto both drives. Lightroom allows you to import photos to more than one location at a time, which would allow you to instantly backup your photos to another hard drive. The MacBook Air only has two USB ports, one is used for the external card reader and one for a HDD, this means I can't plug another drive in for Lightroom to create a second copy to while importing. If you have enough ports this might work for you.
Time Machine was also an option, but this would have meant backing up one hard drive and the laptop to the backup drive. This wasn't quite the workflow I wanted.
I decided to use Carbon Copy Cloner instead, a program which can do a number of things relating to back up and duplication. In this context though it is perfect for simply duplicating the contents of one drive to another, incrementally (it only copies the new files each time not the whole lot again). I set this up to happen any time my two drives are plugged in at the same time, so I don't have to do this manually.
I could have manually copied files from one drive to the other and saved the £30 or so I spent on Carbon Copy Cloner but this would have introduced the possibility of missing files or copying to the wrong location. Any backup or duplication method should be as simple as possible and preferably automated.
Whenever I get the chance I also duplicate files from my primary external hard drive to the internet. I use a service from Digital Ocean called Spaces which essentially gives you some 'space' on the internet you can use to store files. It's a bit like Dropbox but without the fancy interface and syncing features, it's more similar to Amazon S3.
Workflow from shooting to storage
I talked about the kit I'm using to capture images and the kit I'm using to store them but another thing that's often skipped over in posts like this is what a complete workflow looks like.
So here's mine as an example;
1. Shoot some images with my Fuji X-T2 which is set up to record raw images onto the main 64GB card and JPEGs onto the secondary 32GB card.
1a. If I have any shots that I want to post straight to social media I will send the JPEGs from my camera to my phone on an individual basis using Cascable
2. Get back to our room and pull the main card from my camera. Use Lightroom to import the raw files onto my primary hard drive.
3. Review the images and add keywords.
4. Plug both primary and secondary drives into laptop so that any newly imported images are duplicated. (The drives are named 'The Ransleys Travel - A' and 'The Ransleys Travel - B' which allows me to add more drives if needed and use a sensible naming convention)
5. When photos exist on both drives I then format the cards in camera.
I will do steps 1-3 everyday if I've taken lots of photos, or every couple of days if I haven't. Adding keywords often gets missed though!
I make sure to do steps 4 & 5 every few days, so that I don't end up with too many photos left on the memory card from previous days without a backup. I also prefer to get images off the card and onto the hard drives soon to leave space on the card for new images!
My workflow suits the way I shoot and the equipment I'm able to carry with me. It mirrors the same workflow I use at home which helps prevent mistakes as I'm already familiar with it. However you choose to store and backup your images and video make sure you try it out before you leave to make sure everything works as expected. Let me know if you've found any of this helpful or if you have any tips of your own in the comments.